You can bypass the Windows 11 requirements on unsupported hardware in about five minutes, and two of the methods are documented by Microsoft itself. The catch is not the install. It is what happens afterward: no guaranteed feature updates, an “unsupported” watermark, and a support line that will politely hang up on you. This guide covers the three bypass methods that still work in 2026, exactly which checks each one skips, and the honest case for not doing it at all.
First, the rule we apply to every how-to: back up your data before you touch anything. A bypassed install can go sideways, and there is no support desk to call when it does.
Which Windows 11 requirements you actually have to bypass
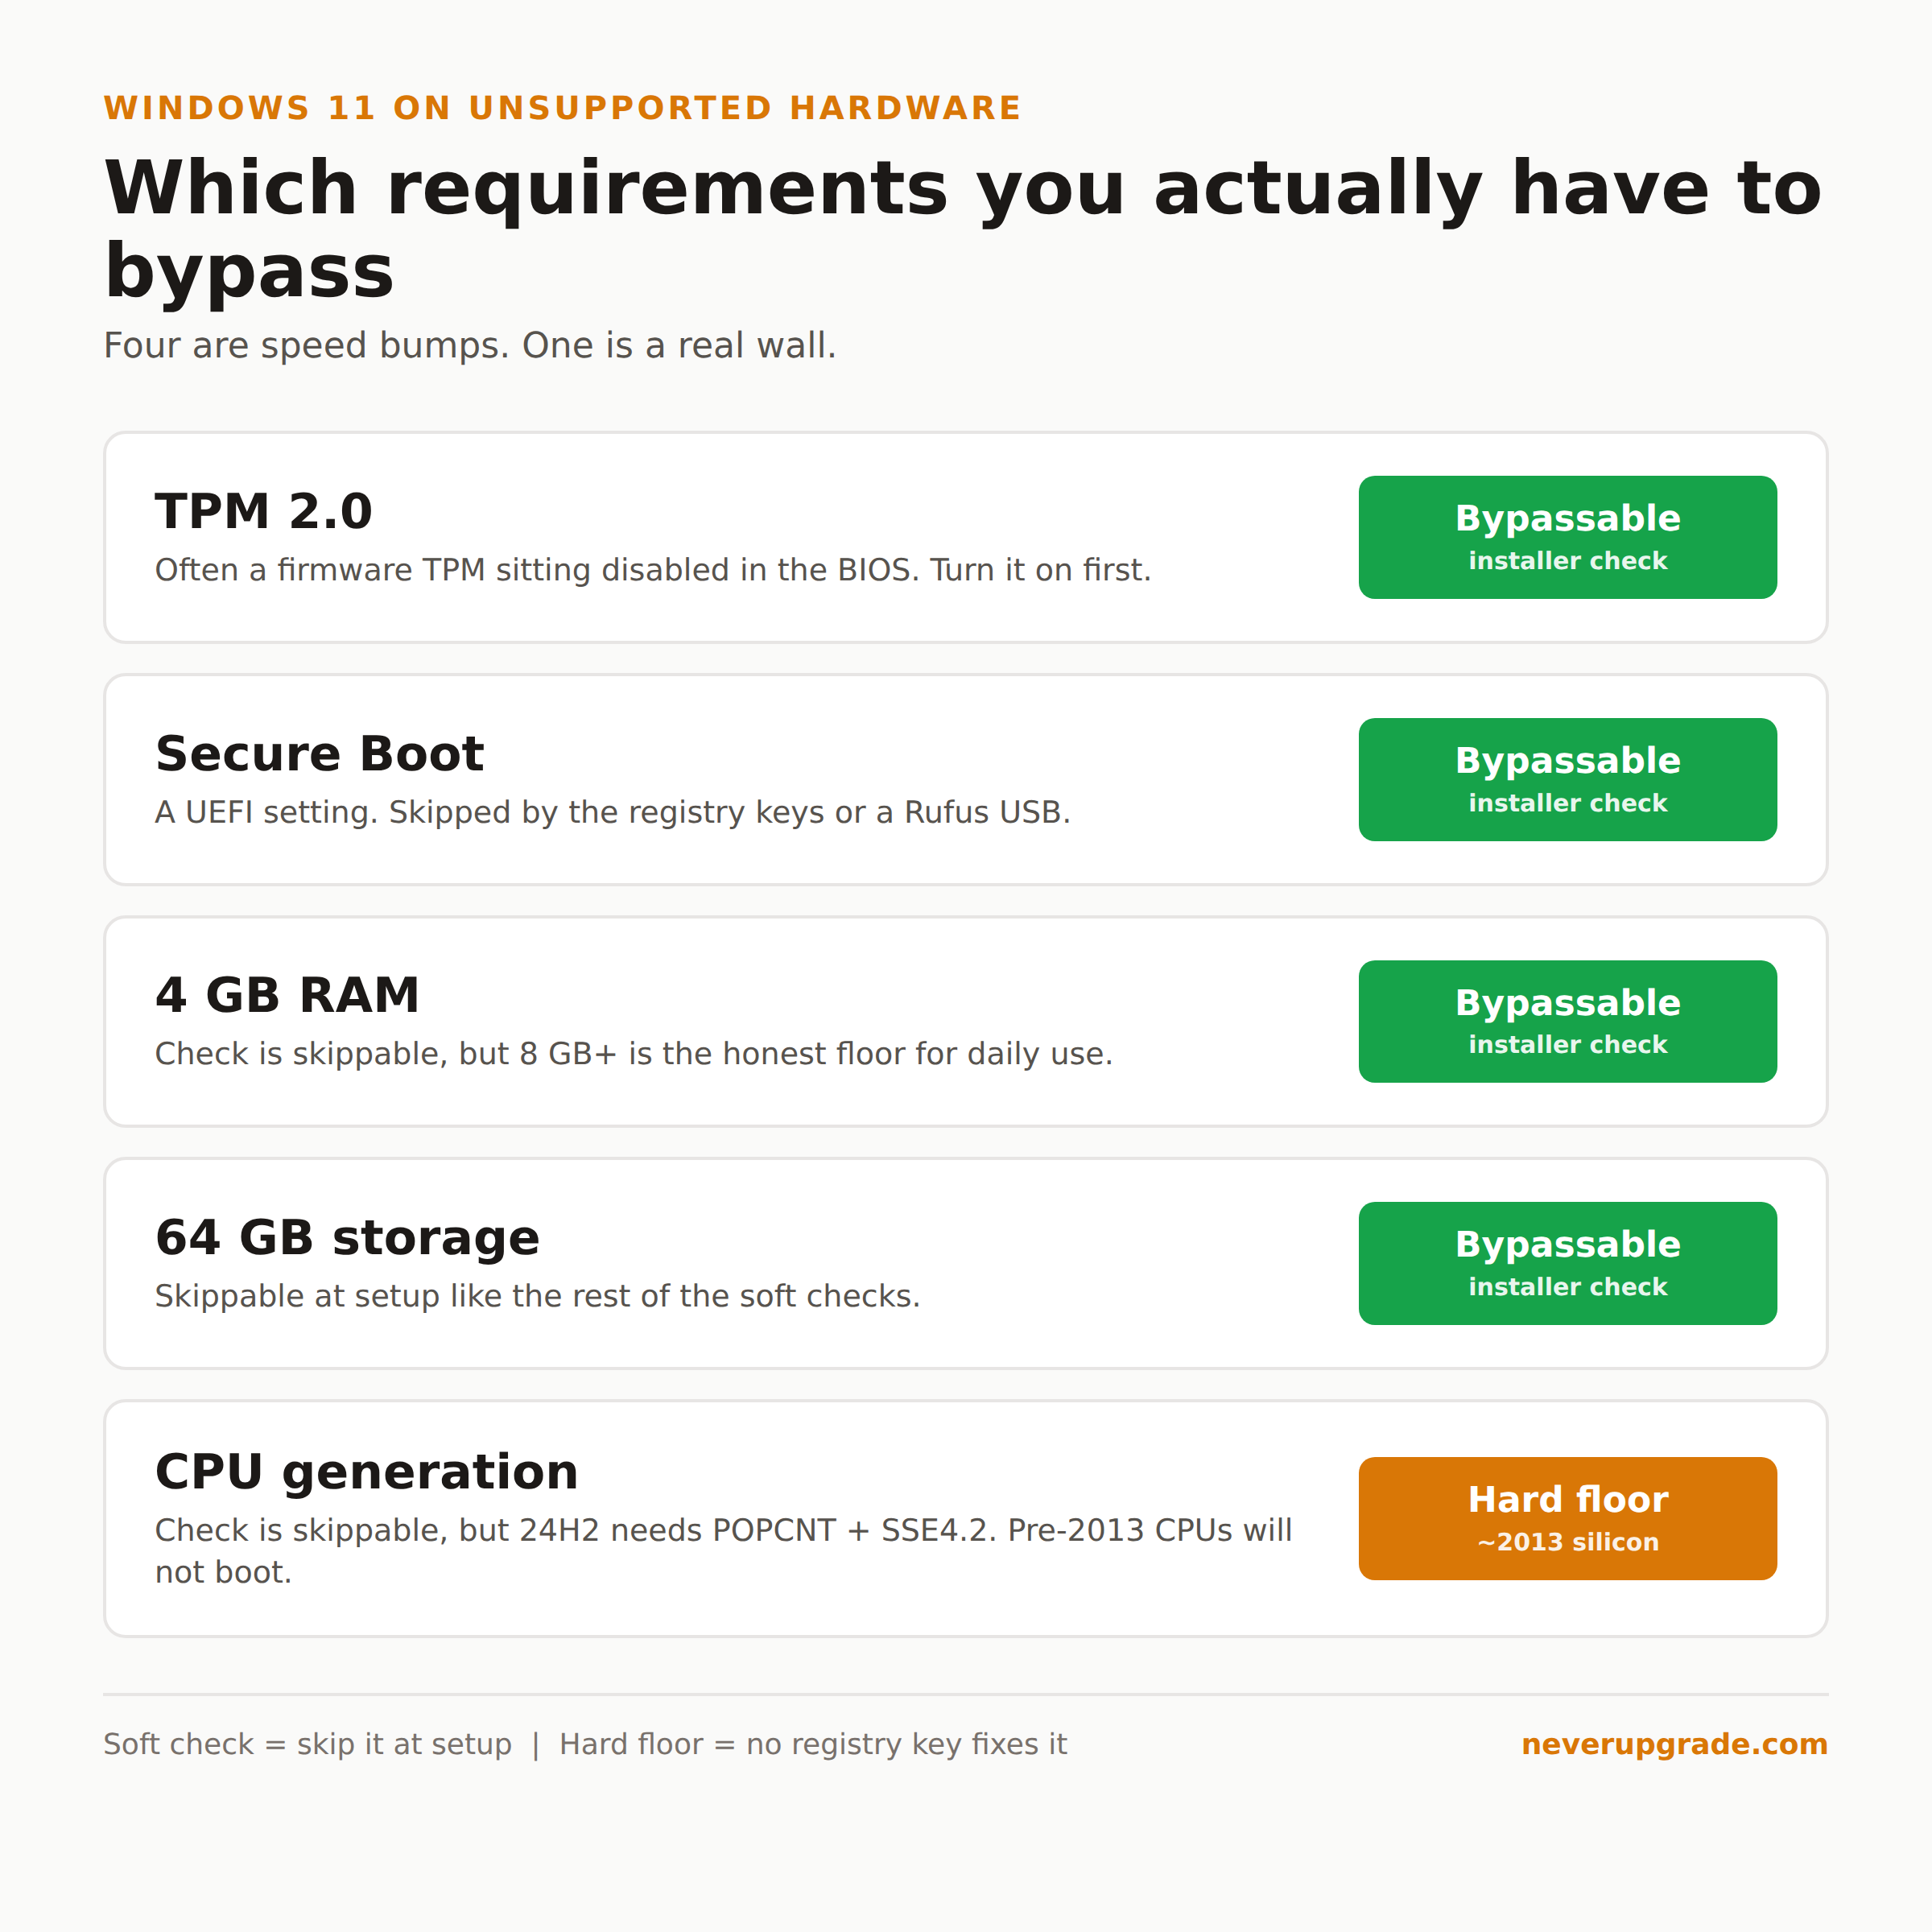
Windows 11 officially demands TPM 2.0, Secure Boot, 4 GB of RAM, 64 GB of storage, and a CPU on Microsoft’s approved list (roughly 8th-gen Intel or Zen 2 AMD and newer). Not all of those checks are equal, and knowing which ones are soft is the whole game.
- TPM 2.0: Enforced by the installer, but trivially bypassed. Most machines from the last decade have a TPM 1.2 chip or firmware TPM (Intel PTT / AMD fTPM) sitting disabled in the BIOS. Turn it on before you assume you have none.
- Secure Boot: Enforced, bypassable. Often just disabled in your UEFI settings.
- RAM and storage: Enforced, bypassable. If you genuinely have under 4 GB, add a stick. Windows 11 is miserable under 8 GB regardless.
- CPU generation: This is the real wall. The installer check is bypassable, but an old CPU that lacks the
POPCNTandSSE4.2instruction sets will fail to boot 24H2 entirely, no matter what registry key you set. That is a hardware limit, not a policy check. Anything Intel 4th-gen (Haswell, 2013) or newer clears that bar.
So the honest framing: TPM, Secure Boot, RAM, and storage are speed bumps. The CPU list is mostly one too, with a genuine floor underneath it at roughly 2013-era silicon.
Method 1: The registry bypass during setup (clean install)
This is the classic. It works during a clean install from a standard Windows 11 ISO or USB, at the exact moment the installer tells you “This PC can’t run Windows 11.”
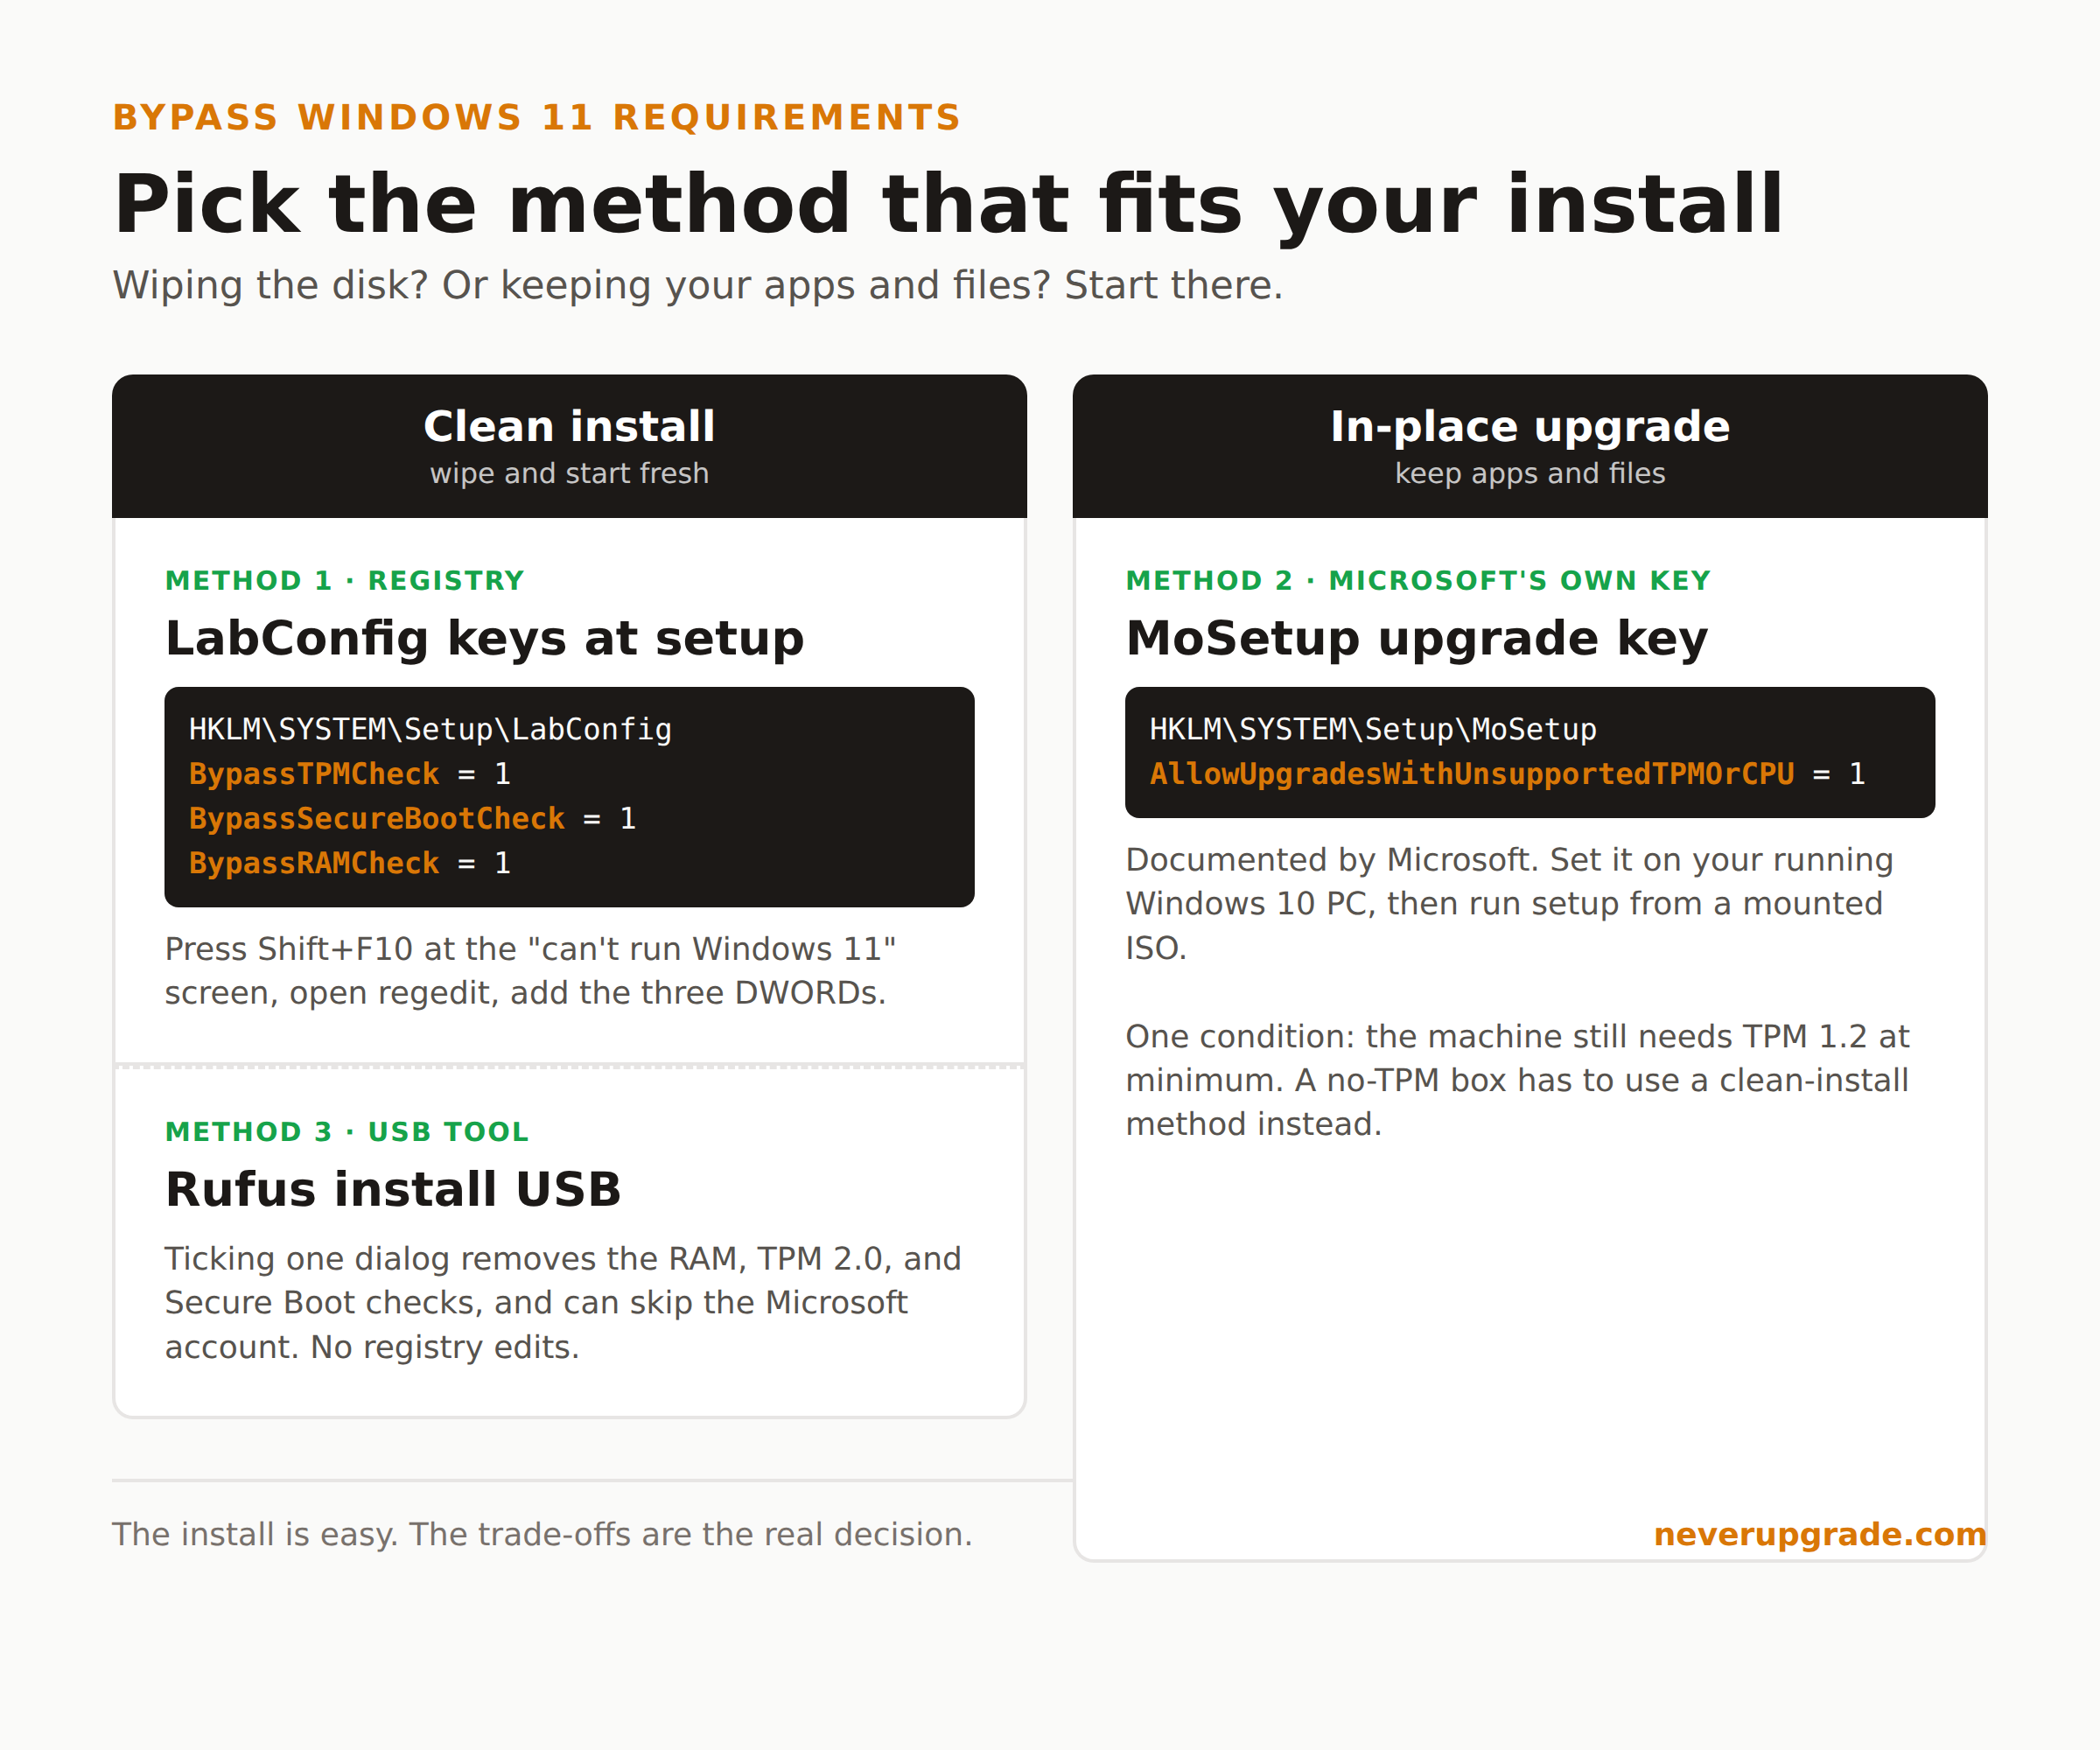
- When you hit the “This PC can’t run Windows 11” screen, press Shift + F10 to open a command prompt.
- Type
regeditand press Enter. - Navigate to
HKEY_LOCAL_MACHINE\SYSTEM\Setup. - Right-click the
Setupkey, choose New > Key, and name itLabConfig. - Inside
LabConfig, create three new DWORD (32-bit) values and set each to1: BypassTPMCheckBypassSecureBootCheckBypassRAMCheck- Close regedit and the command prompt. Click the back arrow in the installer, then Next. The check passes and setup continues.
If your CPU is the thing failing, add a fourth DWORD, BypassCPUCheck, set to 1, in the same LabConfig key. This is the least reliable of the set because, as noted, no registry value can invent CPU instructions your processor physically lacks.
I have run this exact sequence on a 6th-gen Intel NUC and a 2015 ThinkPad. Both installed clean and are still patching monthly. The whole detour adds maybe ninety seconds to a normal install.
Method 2: Microsoft’s own documented in-place upgrade path
Here is the part people miss: Microsoft published a registry key for upgrading unsupported PCs from Windows 10. It is in their own support documentation. Use this one when you want to upgrade in place and keep your apps and files, rather than wipe and reinstall.
On your running Windows 10 machine:
- Open Registry Editor (
regedit). - Go to
HKEY_LOCAL_MACHINE\SYSTEM\Setup\MoSetup. - Create a DWORD (32-bit) value named
AllowUpgradesWithUnsupportedTPMOrCPUand set it to1. - Reboot, then run Windows 11 setup from a mounted ISO (not Windows Update).
The one condition Microsoft attaches: your machine still needs TPM 1.2 at minimum. A total no-TPM box has to use Method 1 or 3 instead. Microsoft also uses this document to warn that unsupported PCs “aren’t entitled to receive updates,” which is corporate for “we reserve the right to stop, but currently we don’t.” Worth reading their exact language before you commit.
Because this key is Microsoft-sanctioned, it is the cleanest option for a work machine you might need to explain later. You followed a documented procedure.
Method 3: The Rufus method for a bypassed install USB
If you would rather not touch the registry mid-install, Rufus (the free USB imaging tool) bakes the bypass into the installer media itself. This is the most beginner-proof route.
- Download the official Windows 11 ISO from Microsoft and a fresh copy of Rufus.
- Insert an 8 GB or larger USB stick. Rufus wipes it, so use an empty one.
- Select the ISO in Rufus and click Start.
- Rufus pops a “Windows User Experience” dialog. Tick the boxes to remove the 4 GB RAM, TPM 2.0, and Secure Boot requirements. While you are there, tick the option to skip the Microsoft account requirement so you can create a local account.
- Let it build, boot from the USB, and install normally. No registry edits, no interruptions.
Rufus is the option I hand to people who are nervous about regedit. It removes the same checks Method 1 does, plus it kills the forced online-account and telemetry nags in one pass. The old setup.exe /product server appraiser trick used to do something similar, but Microsoft disabled it in newer ISO releases, so skip anything that still recommends it.
The real risks: no guaranteed updates, no support
None of this is free. Be clear-eyed about the trade:
- Feature updates are a coin flip. Monthly cumulative security updates install fine on bypassed machines. The big annual feature updates (23H2 to 24H2 and beyond) are unpredictable: sometimes they install, sometimes they hard-block on the same requirement you bypassed, and you have to repeat the ISO trick to move forward.
- The watermark. You get a “System requirements not met” watermark on the desktop and a nag in Settings. Cosmetic, but permanent unless you re-bypass on each upgrade.
- No official support. If something breaks, Microsoft support can decline to help an unsupported configuration. There is no vendor safety net.
- The 24H2 CPU floor is real. This is the one hard failure. If your CPU predates the
POPCNT/SSE4.2requirement (pre-2013, roughly), 24H2 will install and then bootloop or bluescreen. No registry key fixes that.
Notice what is not on this list: malware doom, instant bricking, data loss on day one. Bypassed Windows 11 runs fine. The cost is maintenance friction and losing the right to complain, not catastrophe.
When you should just stay on Windows 10 instead
Contrarian take from someone who bypasses these checks for fun: for a lot of machines, the smarter move in 2026 is to not bother.
Windows 10 with Extended Security Updates keeps getting security patches into October 2026 and beyond, on hardware Microsoft officially supports, with no watermark and no upgrade roulette. If your PC runs Windows 10 well and your only reason to move is the end-of-support countdown, ESU or micropatching buys you a supported year for less hassle than babysitting a bypassed Windows 11.
Bypass Windows 11 requirements when you have a concrete reason: an app that needs Windows 11, a Copilot or DirectStorage feature you actually use, or a machine you are keeping for five more years and want on the current train. Do it because you want to, not because a nag screen scared you. And if the machine is genuinely too old for 24H2’s CPU floor, installing Linux is a better long-term answer than fighting an OS that keeps trying to evict you.
FAQ
Does bypassing Windows 11 requirements void updates?
No, not the ones that matter. Monthly cumulative security updates install normally on bypassed hardware. What is unreliable is major feature updates (the annual releases), which may block and force you to re-run the ISO bypass to proceed. Microsoft reserves the right to withhold updates from unsupported PCs but has not broadly done so.
Can I bypass the Windows 11 CPU requirement?
You can bypass the installer’s CPU check with a BypassCPUCheck registry value or a Rufus USB, but you cannot make a truly incapable CPU work. Windows 11 24H2 requires the POPCNT and SSE4.2 instructions, so processors older than roughly 2013 (pre-Haswell) will fail to boot even after the check is skipped. Anything newer than that is fine.
Is it safe to install Windows 11 on unsupported hardware?
It is stable and usable, not dangerous. Bypassed installs run reliably and stay patched with monthly updates. The real downsides are a desktop watermark, occasional trouble with feature updates, and no official Microsoft support. It will not brick your PC or expose you to immediate risk, but you are on your own if something goes wrong.
The bottom line
The bypass is easy: a three-value registry key during setup, Microsoft’s own MoSetup key for in-place upgrades, or a Rufus USB that does it for you. The decision is the hard part. If you have a real reason to be on Windows 11, pick the method that fits (Rufus for a clean install, MoSetup for an upgrade) and go. If you are only running from the Windows 10 clock, look at whether you can keep using Windows 10 first. The best upgrade is often the one you chose to skip.