If msinfo32 shows “Secure Boot State: Unsupported” on your Windows 10 machine, you do not have a virus and Windows is not broken. It means your PC is either running in legacy BIOS mode instead of UEFI, or your motherboard firmware has the feature turned off, or (less often) the hardware genuinely predates Secure Boot. None of those are emergencies by themselves, but one of them is about to matter more than it used to.
What “Secure Boot State: Unsupported” actually means
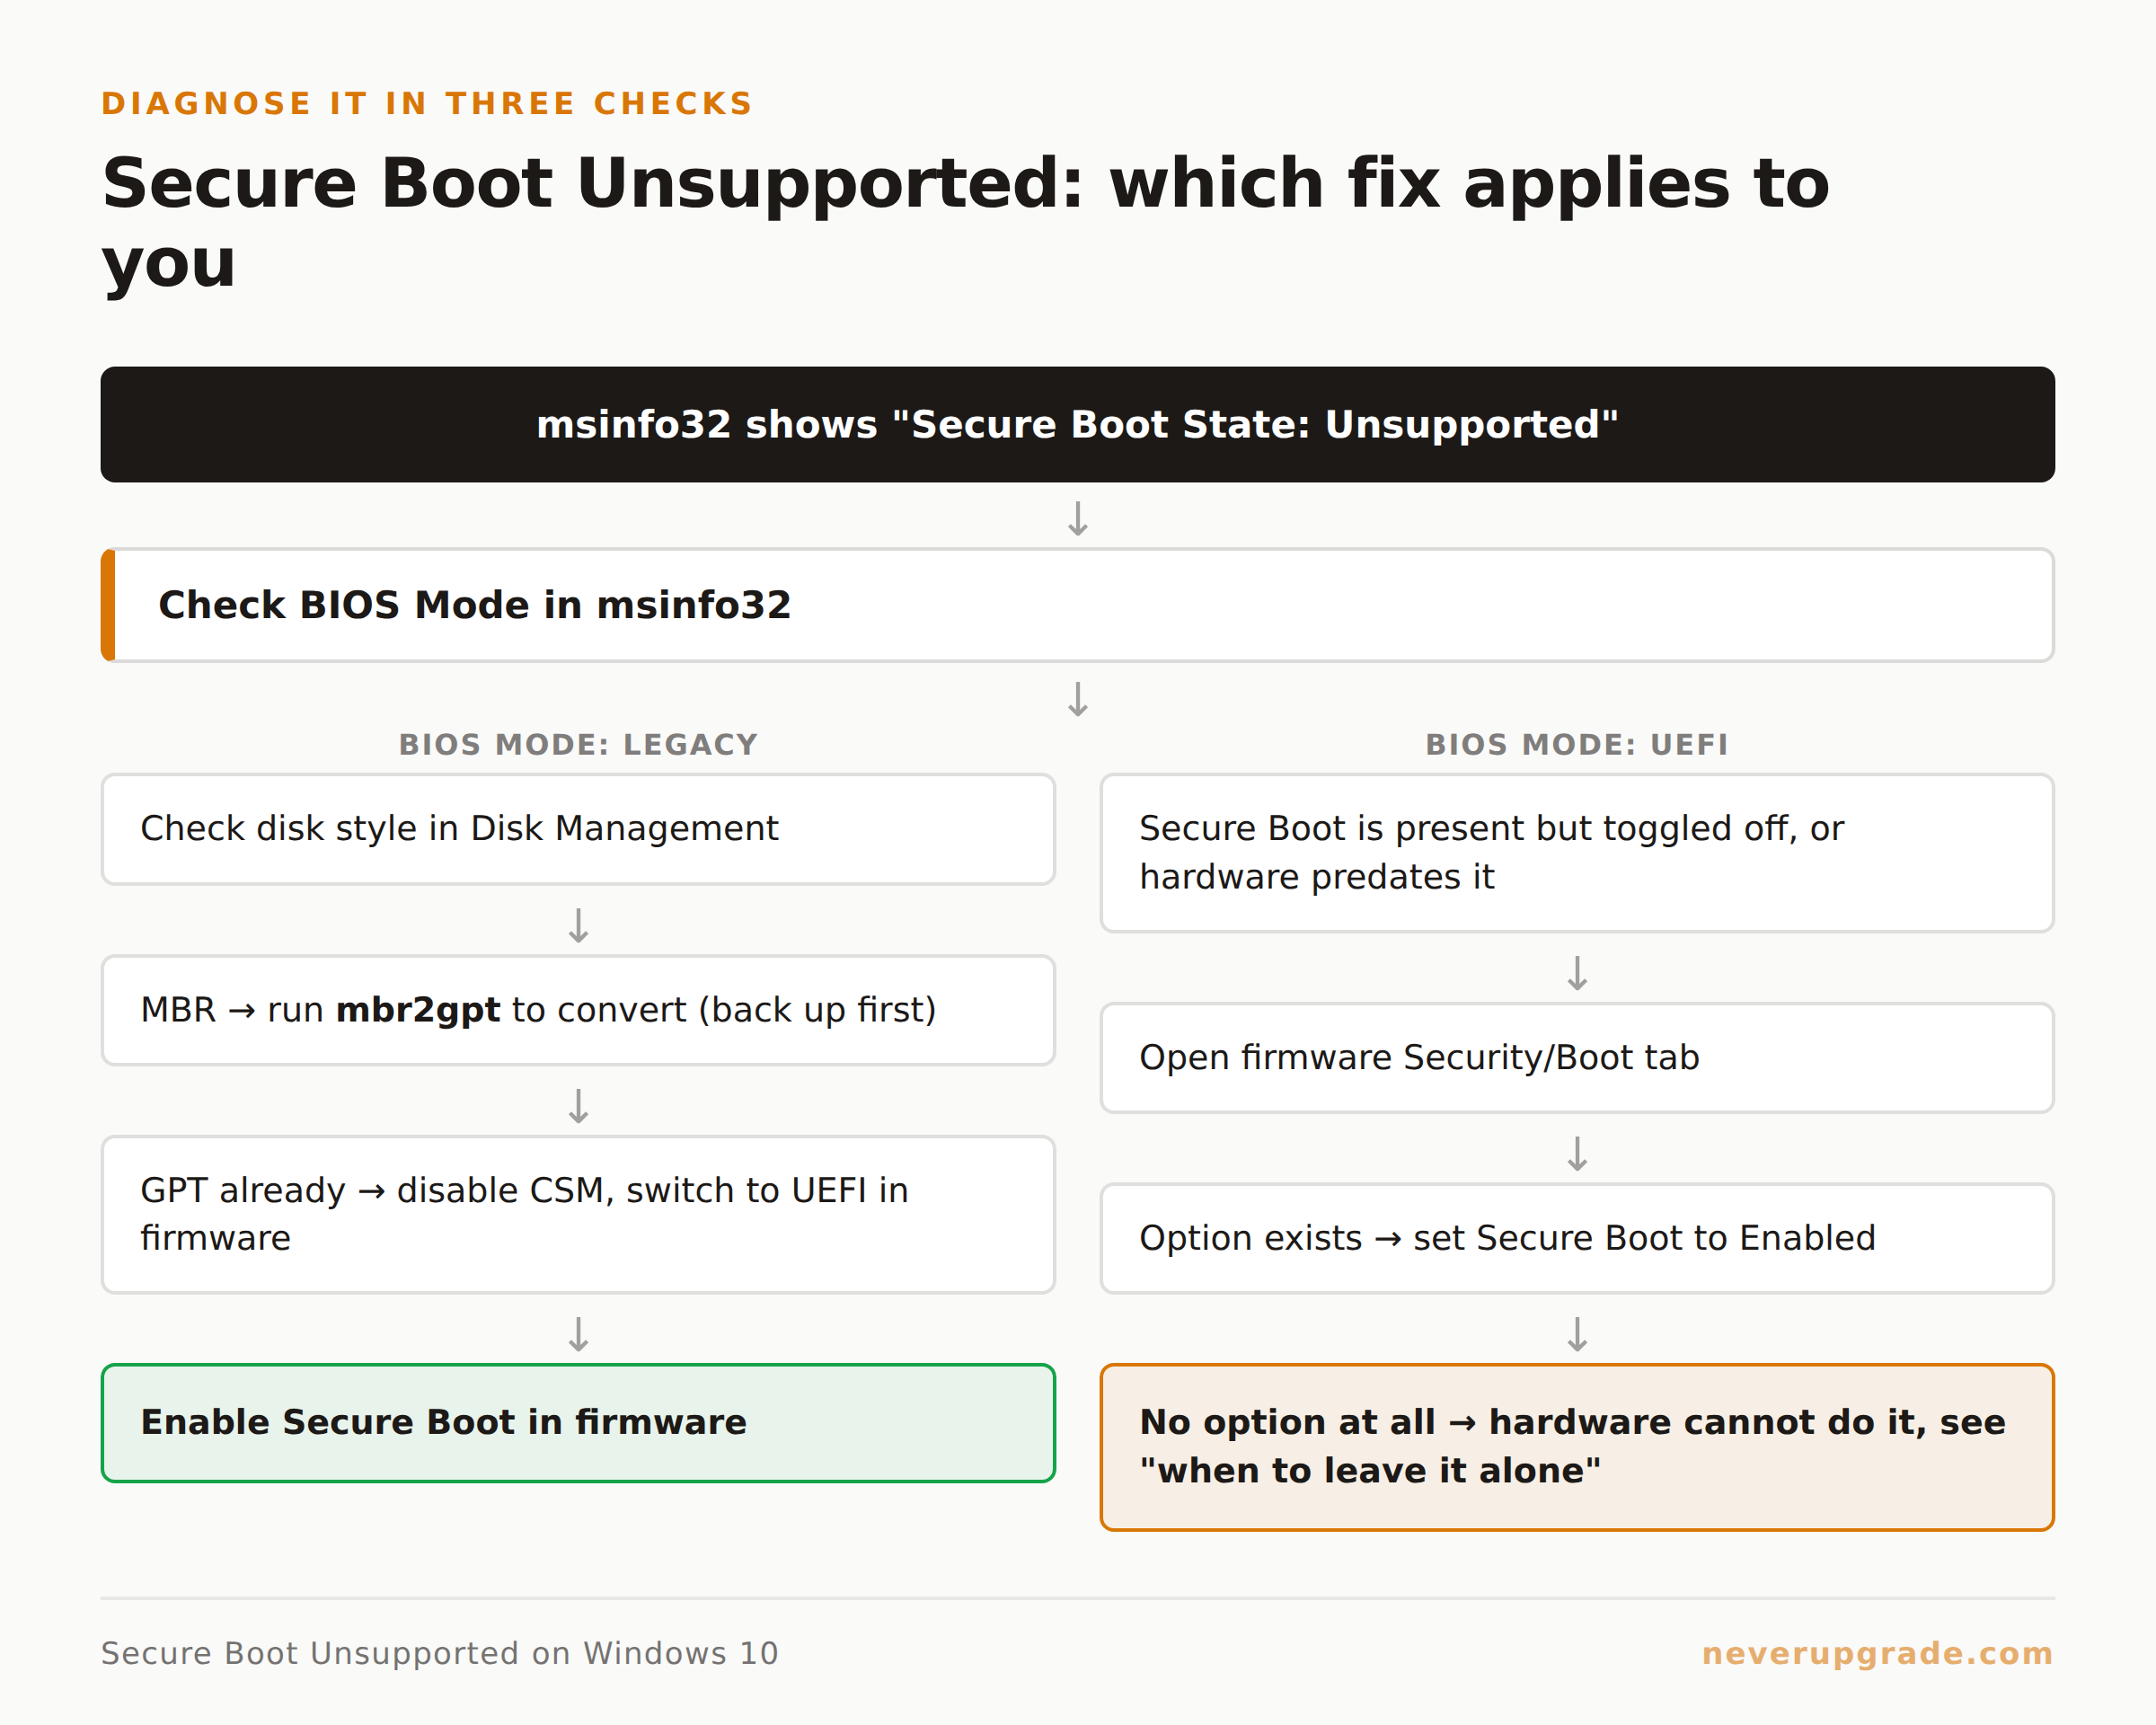
Open the Start menu, type msinfo32, hit Enter, and look at two lines in System Summary: BIOS Mode and Secure Boot State. If BIOS Mode says “Legacy” instead of “UEFI,” that’s your answer right there. Secure Boot is a UEFI feature. It cannot run at all under Legacy/CSM boot, so Windows correctly reports it as unsupported, not off.
If BIOS Mode already says UEFI and Secure Boot State still says Unsupported, the cause is narrower:
- Secure Boot is disabled in firmware settings, even though UEFI itself is active.
- The motherboard is old enough that its UEFI implementation never included Secure Boot support at all (common on boards from roughly 2011 and earlier, before UEFI-based Secure Boot was standard).
- CSM (Compatibility Support Module) is still enabled alongside UEFI, which blocks Secure Boot from initializing even though the mode looks right on paper.
One thing “Unsupported” does not mean: it does not mean Windows 10 will stop booting, and it does not mean you’ve been hacked. It’s a firmware capability flag, not a health check.
Is this dangerous, or just a cosmetic warning
Historically, mostly cosmetic. Secure Boot’s job is to stop unsigned bootkits and rootkits from loading before Windows itself starts. On a Windows 10 machine that’s already past its normal support cutoff and only alive today through Extended Security Updates, that protection layer matters more than it did in 2016, but going without it hasn’t been an acute risk for most home and small-business setups running normal antivirus and sane browsing habits.
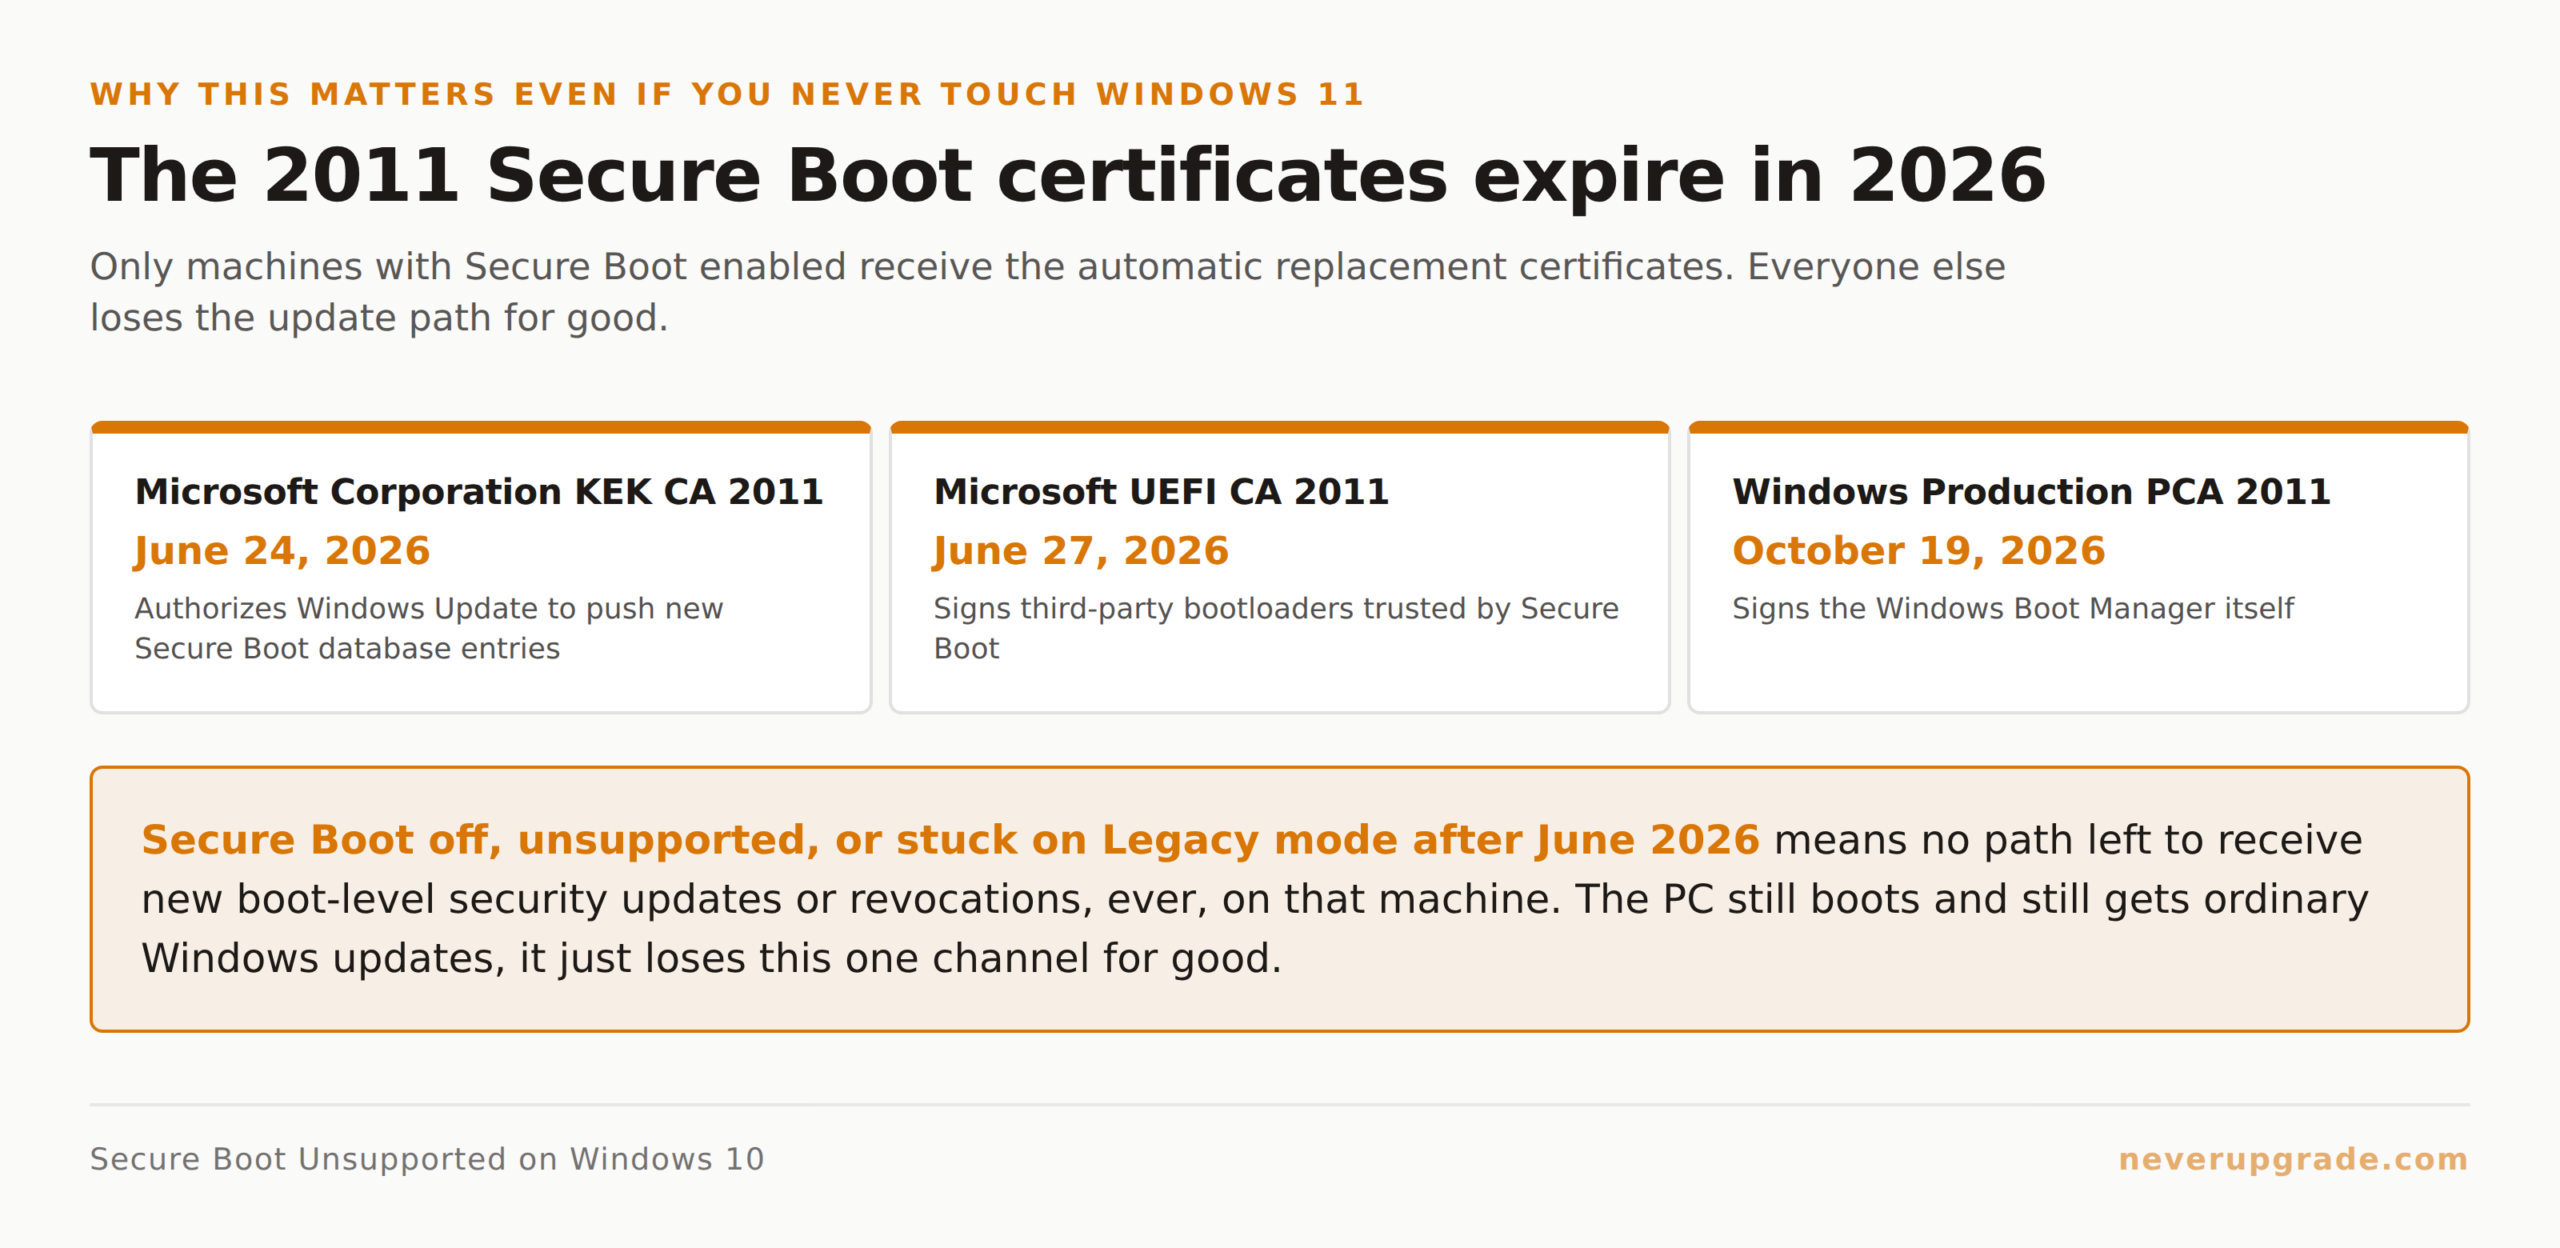
That calculus changes on a fixed date. Microsoft’s original 2011 Secure Boot certificates start expiring next year: the Microsoft Corporation KEK CA 2011 on June 24, 2026, and the Microsoft UEFI CA 2011 three days later on June 27, 2026 (the Windows Production PCA 2011 follows in October 2026). Machines that get the automatic certificate rollout keep receiving Secure Boot database and revocation updates without you noticing anything. Machines where Secure Boot is off, unsupported, or stuck on Legacy mode cannot receive that rollout at all, because there is no Secure Boot database to update in the first place.
Practically: your PC keeps booting and keeps getting ordinary Windows updates either way. What you lose, if you’re still on Legacy/CSM after June 2026, is any future ability to revoke a compromised bootloader through Secure Boot’s normal channel. For a shop running Windows 10 well past its own end of support, that’s exactly the kind of quiet gap that turns into the incident nobody explains until after it happens.
How to check your current Secure Boot and UEFI status
Before touching any firmware setting, confirm what you’re actually working with:
- Press Windows key + R, type
msinfo32, press Enter. - In System Summary, note BIOS Mode (Legacy or UEFI) and Secure Boot State (On, Off, or Unsupported).
- Also check PC health check or run
tpm.mscto see whether a TPM is present and enabled. Secure Boot and TPM are separate features, but firmware from the same era often ships with both, and you’ll want both if you ever plan to move this hardware to Windows 11. - Open Disk Management (
diskmgmt.msc), right-click your Windows drive, and check whether it’s partitioned as GPT or MBR. UEFI Secure Boot requires a GPT boot disk; MBR will not work no matter what you enable in firmware.
Write down BIOS Mode and partition style before you go further. That combination determines which of the next paths applies to you.
Before you start: back up
Converting boot mode or partition style touches the one thing standing between your data and a machine that won’t start. Image the drive, or at minimum copy anything irreplaceable off it, before you open the BIOS. A Secure Boot fix should take fifteen minutes; recovering from a botched MBR-to-GPT conversion with no backup can eat a whole weekend.
Step by step: enabling Secure Boot safely
If BIOS Mode is UEFI and the drive is already GPT:
- Restart and enter firmware setup (usually F2, Del, F10, or Esc during boot; check your manufacturer’s splash screen).
- Find the Security or Boot tab and locate Secure Boot.
- Set it to Enabled.
- If a “Secure Boot Mode” option offers Standard vs. Custom, choose Standard unless you specifically manage your own key databases.
- Save and exit (usually F10), then confirm in
msinfo32that Secure Boot State now reads “On.”
If BIOS Mode is Legacy (the more common case on older hardware):
- Confirm your drive is GPT first (see above). If it’s still MBR, stop here and read the next section before doing anything else.
- Enter firmware setup and find CSM (Compatibility Support Module) or “Legacy Support.”
- Disable CSM. This is usually what unlocks the Secure Boot toggle in the first place.
- Switch Boot Mode from Legacy to UEFI.
- Save and reboot. If Windows fails to start at this point, your disk was MBR after all; revert CSM to enabled and go convert the disk before trying again.
- Once Windows boots normally in UEFI mode, go back into firmware and enable Secure Boot as described above.
If your disk is MBR and you want to move to GPT/UEFI:
Windows 10 includes mbr2gpt.exe for exactly this. From an elevated Command Prompt, run mbr2gpt /validate /allowFullOS first to check compatibility, then mbr2gpt /convert /allowFullOS to perform the conversion without wiping the drive. It works in place, but “works in place” is doing a lot of load-bearing work in that sentence, which is why the backup step above is not optional.
When to leave it alone instead
Skip all of this if any of the following is true:
- Your hardware doesn’t support UEFI Secure Boot at all. Some boards from the early 2010s and earlier have no Secure Boot capability in firmware, full stop. Forcing CSM off on that hardware won’t reveal a hidden Secure Boot option; it’ll just break your boot.
- The machine runs a certified configuration you can’t touch. Lab equipment, POS terminals, or industrial controllers validated against a specific boot configuration should stay exactly as certified. Call the vendor before changing firmware settings on anything like this.
- You’re planning to retire the machine before June 2026 anyway. If this box is already scheduled for replacement, the certificate expiration window doesn’t apply to you and an afternoon spent reformatting a boot disk is an afternoon you don’t need to spend.
In those cases, the honest move is to compensate elsewhere: keep the machine off the internet where possible, keep endpoint protection current, and don’t treat “Secure Boot: Unsupported” as a problem you’re obligated to solve on hardware that was never built to support it.
If you’re already dealing with a machine that can’t meet Windows 11’s TPM and Secure Boot requirements and you’re weighing whether to force an upgrade anyway, our guide on bypassing Windows 11’s hardware requirements covers what that actually costs you long-term. And if you’ve already made that jump and regret it, we’ve also covered how to roll a forced Windows 11 upgrade back to Windows 10.
FAQ
What does “Secure Boot state: Unsupported” mean in Windows 10?
It means your PC’s firmware cannot currently run Secure Boot, either because it’s set to Legacy/CSM boot mode instead of UEFI, because Secure Boot is switched off in firmware even though UEFI is active, or because the hardware itself never supported the feature. Check BIOS Mode and Secure Boot State together in msinfo32 to tell which case applies.
Can I enable Secure Boot without reinstalling Windows?
Usually yes. If your disk is already GPT, switching CSM off and Secure Boot on in firmware is typically enough, no reinstall required. If your disk is still MBR, you’ll need to convert it to GPT first with mbr2gpt, which also works without a reinstall, but back up first regardless.
Do I need Secure Boot if I’m not upgrading to Windows 11?
You don’t need it to keep Windows 10 running day to day. But Microsoft’s original Secure Boot certificates start expiring in June 2026, and only machines with Secure Boot properly enabled will receive the replacement certificates automatically. If you’re planning to keep this hardware in service past mid-2026, enabling it now is worth the fifteen minutes.